Installation for tigressdata users
Installation
For tigressdata cluster machines you can go in two different ways.
- Easy way: you make an alias to run an already configured Blender from my home directory.
- Difficult way: you download and set everything up yourself.
Easy way
Note
Make sure you have pre-loaded module virtualgl. Check this by doing $ module list. To load it you can do $ module load virtualgl/2.3.3.
Open your bash profile by doing:
$ gedit ~/.bashrc
Add the following alias to the end of the file:
alias blender="vglrun /home/hakobyan/Downloads/Blender/blender -P /home/hakobyan/Downloads/BRender/initialize_blender/init_script.py"
You’re all set. Now by running blender from the command line you’ll get a Blender app with preloaded BRender module. You might also want to set up a default scene, check instructions here.
Difficult way
Clone BRender repo
- Go to any desired directory of your choice.
- Do
$ git clone https://github.com/haykh/brender_astro.gitto clone the repo. - The library and all the necessary files will be downloaded to the current directory.
Warning
We’ll next download the Blender app. This requires several hundreds MB of disk space, so be prepared.
Installing and configuring Blender
- Download Blender 2.76 from here.
- Extract the archive.
Note
We then need to adjust some of the Blender import/export files. You can do it manually following steps 3-6, or you can simply download the already fixed files and replace the original ones (see step 7).
Navigate to the following folder:
$ cd /path-to-blender-installation/2.76/scripts/addons/io_scene_obj/
Open
import_obj.pyand add these two lines:
# ...
elif line_id == b'tf':
    # rgb, filter color, blender has no support for this.
    pass
elif line_id == b'em': # ADD THIS LINE (BRender)
    context_material.emit = float_func(line_split[1]) # ADD THIS LINE (BRender)
elif line_id == b'illum':
    illum = int(line_split[1])
# ...
- In the same file comment out the following line:
# ...
if emit_value > 1e-6:
    # We have to adapt it to diffuse color too...
    emit_value /= sum(context_material.diffuse_color) / 3.0
# context_material.emit = emit_value # <- COMMENT THIS LINE OUT (BRender)
if not do_ambient:
    context_material.ambient = 0.0
# ...
- Save the file and open
export_obj.py. Add this line and save the file:
# ...
    elif mat.use_transparency and mat.transparency_method == 'RAYTRACE':
            fw('illum 9\n')  # 'Glass' transparency and no Ray trace reflection... fuzzy matching, but...
    else:
            fw('illum 2\n')  # light normaly
    fw('em %.6f\n' % mat.emit) # ADD THIS LINE (BRender)
else:
    # Write a dummy material here?
# ...
- For the sake of convenience, I added those two
.pyfiles for Blender 2.76, so you can just download and replace the original ones which are in here/path-to-blender-installation/2.76/scripts/addons/io_scene_obj/.
Blender setup
Note
If you followed the “Easy Way” in the installation section proceed to step 6.
If you haven’t cloned this repo yet, it’s time to do it:
$ cd /any-folder-you-like/
$ git clone https://github.com/haykh/brender_astro.git
Then navigate to
initialize_blender/inside the cloned repository and openinit_script.py.Modify the path in the 2-nd line writing the correct path to the downloaded repo.
Open bash_profile with
$ gedit ~/.bashrcand add the following line with a correct path to the downloaded repo and blender:alias blender='vglrun /path-to-blender/blender -P /path-to-brender/initialize_blender/init_script.py'
Note
Make sure you have pre-loaded module virtualgl. Check this by doing $ module list. To load it you can do $ module load virtualgl/2.3.3.
- Restart the terminal. Now every time we do
$ blenderin the terminal, the Blender app will launch pre-running theinit_script.py, which imports the module and does a quick setup of lighting. - From cloned BRender repo (or from here) copy
initialize_blender/tigressdata/startup.blendfile to/home/<username>/.config/blender/2.76/config/(if the folder doesn’t exist, create it). This will set a default working screen that (for me) fits the best for script-based visualization.
Now once you run:
$ blender
from the terminal, you should see the following Blender window.
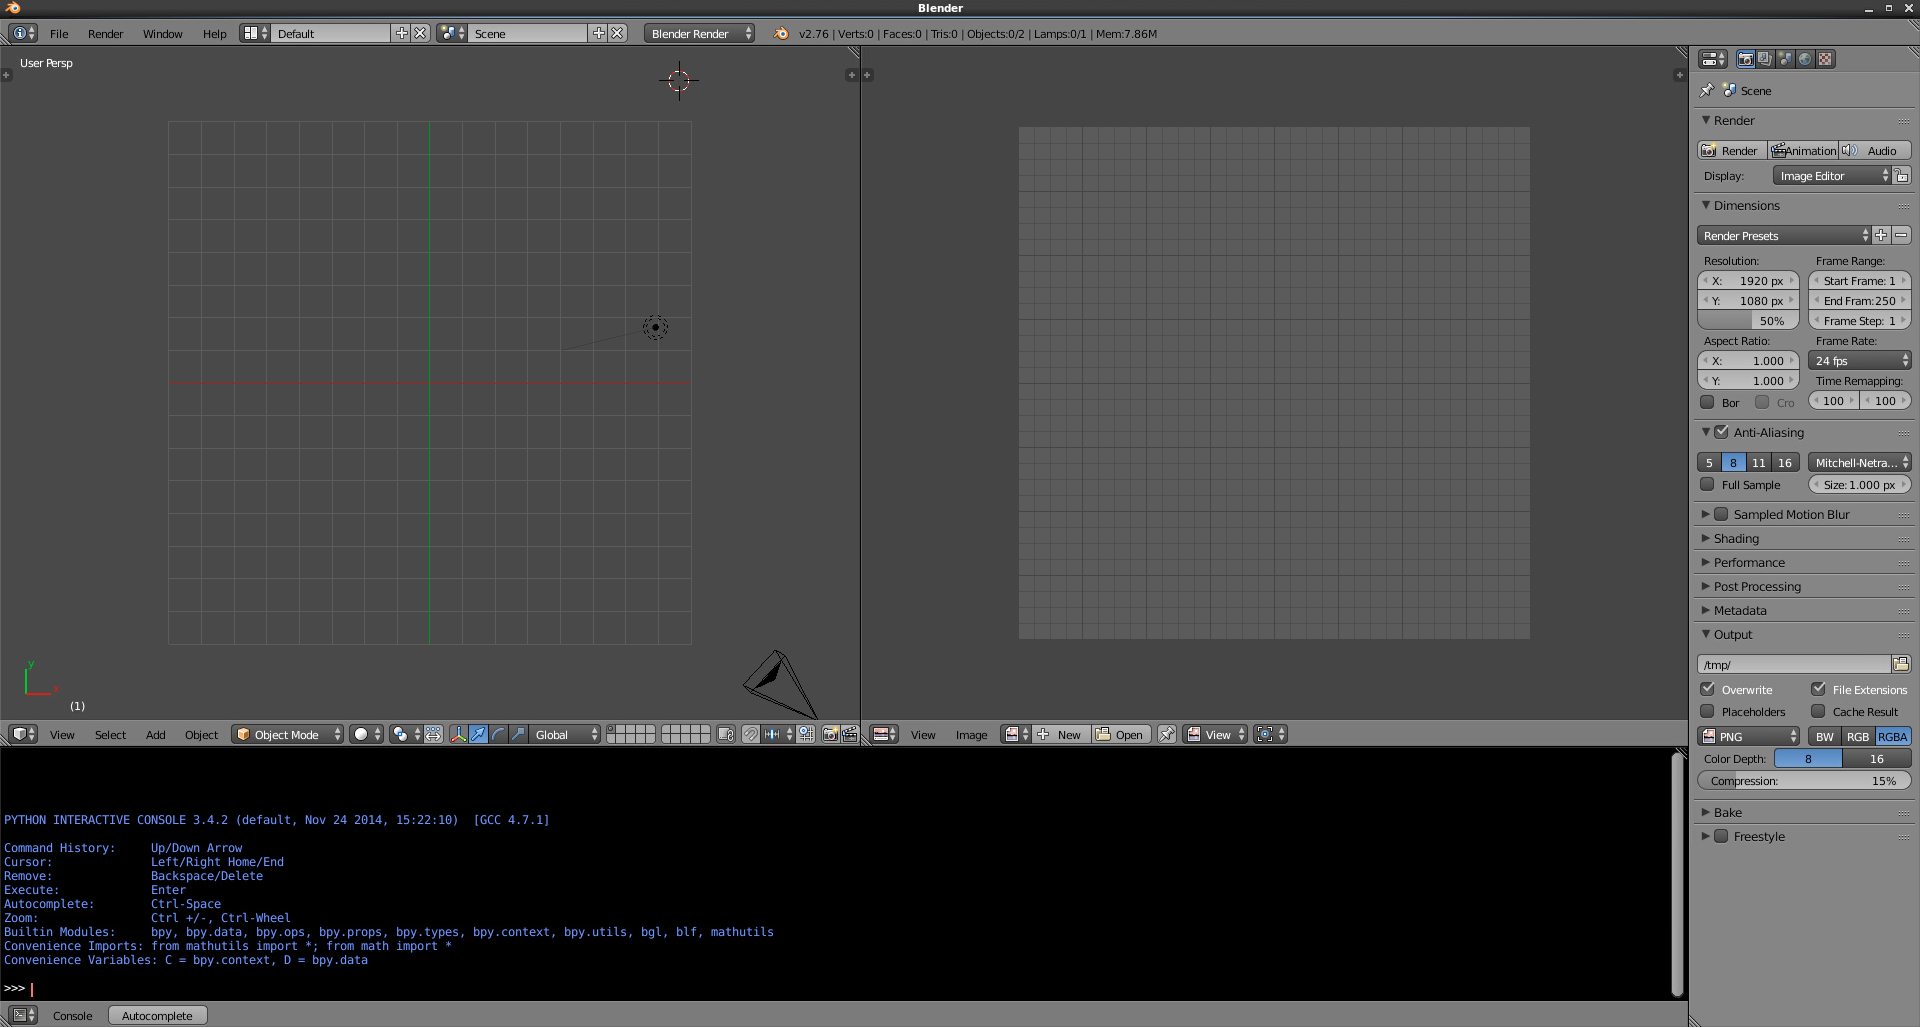
- (top left) 3D viewport with all the objects of our scene
- (top right) rendered image will be displayed here, which is now just empty
- (right)
Propertiestab with all the material and object properties - (bottom) python console that uses Blender’s bundled Python 3 (most of the time we’ll be using this console)
- You can also configure your own workspace layout (consoles, 3d viewports etc) and save it as default by doing
Ctrl+U.